Projects

Thursday, July 3, 2014

Timewarp Thursday! Orks!

With the talk on various blogs of the new arrival of the Ork Codex for 40k it got me thinking about my own long mothballed Ork army. Many years ago I was a pretty dedicated player of 40k although even then it was mostly about the background and modelling. My clan of choice for the Orks was always the Blood Axes as their bizzaro interpretation of the Imperial Guard always struck a chord with me.

Da Kaptan and his pet Squig
This is actually the second time I built a Blood Axe army and I still regret selling off the first one especially since I never took any pictures of it. In particular I wish I had some pictures of my Rambo-styled Kommandos and the fearless leader Kommisar Klang. This time I at least want some pictures to be able to remember my work if I ever have to part with them again.

'ard Boyz made with Black Orc parts
All of the work for these guys was done way back in 2008 and they were put together pretty quickly hence the simple, rust and red paint scheme. I wanted to get a force on the table and then add the character to it later. I originally planned to go with more of a Orkish Afrika Korps look for later models, especially the tank hunters and kommandos. I still have some partially converted but by then I had moved onto other projects. Maybe one day I'll get back to them.

My lone Mega Armour Ork and the back half of a Trukk

This looted Leman Russ was one of my favorites but routinely performed horribly in games. 


Most of the boyz were built from the Assault on Black Reach box. 

Shoota Boyz - I had a bunch more ready to paint with the forage caps sculpted on but that was when I ran out of steam for the army. 

Saturday, June 28, 2014

Crate Factory

Is there a equivalent term for crates as a cooper is to barrels? I'm guessing not but maybe there should be.

I decided on a pancake or plug style mold for the crates. Basically a one piece mold but with a lid on it. In the past I have always made two part drop style molds where you poor the resin into the assembled mold or simple one piece molds that are open on top. So this is a bit of an experiment.

Not only is the mold a rather nice shade of purple but it also smells kinda like grapes.
Making the actual mold was a bit of an adventure as I'm using a new material. Didn't realize till now that instead of any easy 1:1 mix like what i use to use it this one is 10:1 by weight. I didn't have a scale on hand so I eyeballed it and luckily it turned out alright. A few castings later and I had a nice handful of crates ready to go.

First pile of crates for everyone to hide behind.

Thursday, June 12, 2014

Crates and Such

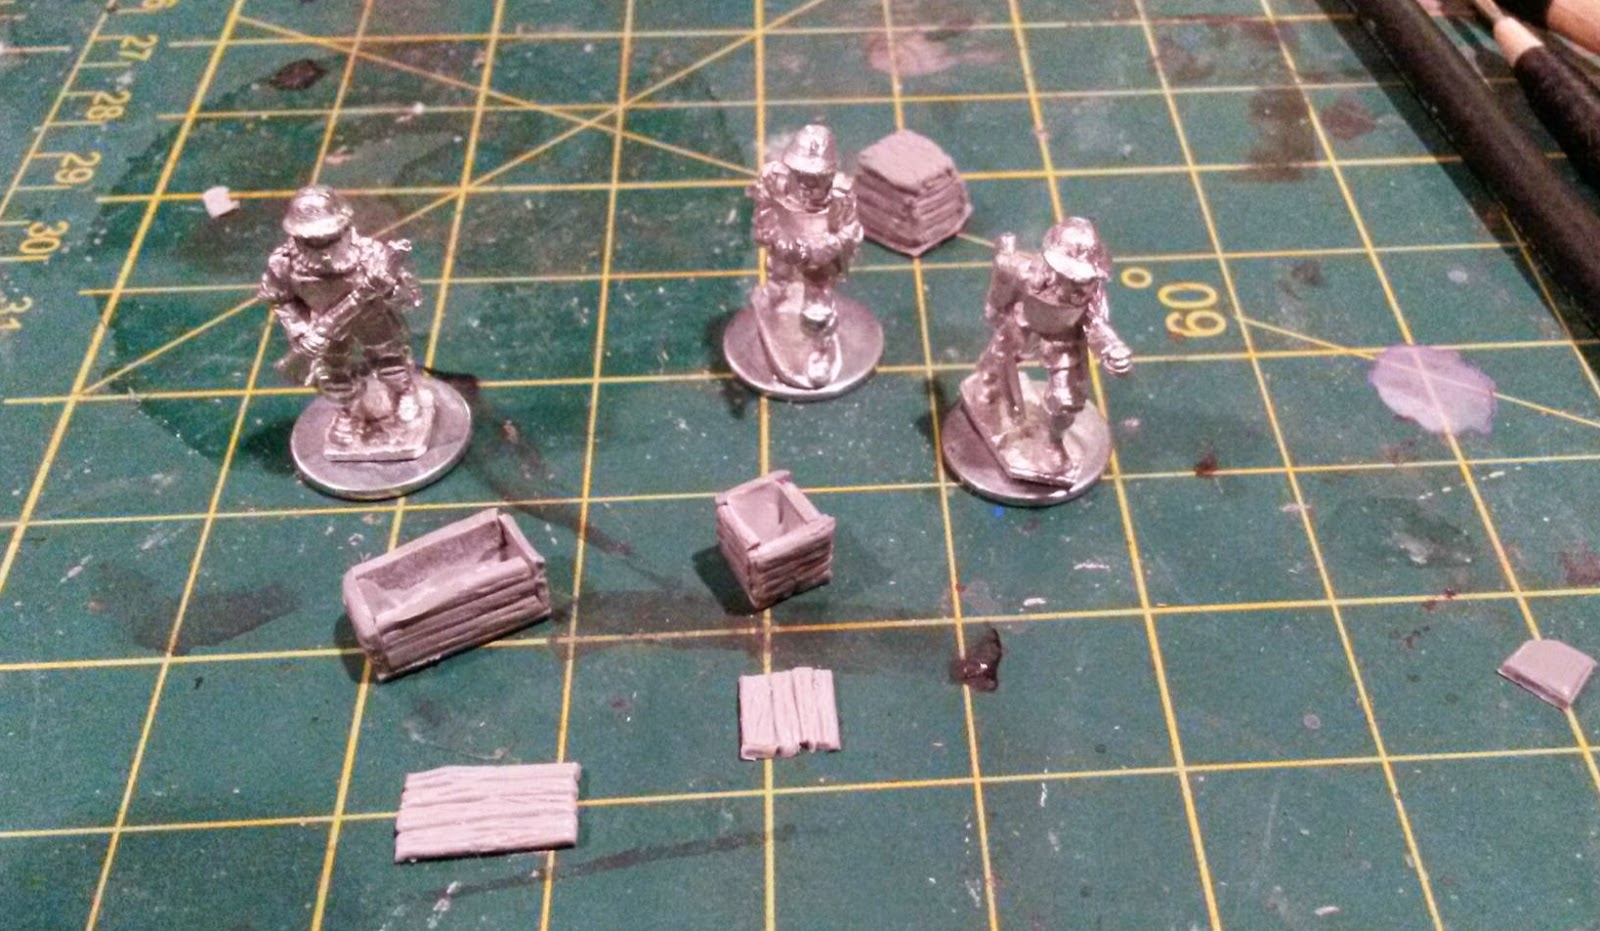
Not much happening with painting which means my queue is really stacking up with the new All Quiet stuff being added to it. I have been doing some sculpting though.I've been using leftover putty from other projects to make some odds and ends. My first idea was to make some various crates, stowage, and other items to use as street dressing and for an eventual warehouse.


My first crate was a bit of a mess. I just slapped some putty on around a rough cube cut from some cured putty. It looks like the carpenter was having a really bad day or let his kid make it. I'll probably just stick it in the center of a pile of other stuff to disguise it.

Next up I decided to rethink my construction technique. This time I rolled the putty out to a uniform thickness and then sculpted detail on while still flat. Then I glued the parts together. Much better, so I made a second one as well.


For a future warehouse I'll need many more so I'm going to try to make a mold of these to duplicate them. I reinforced the inside of the crates with some putty and then at the last moment decided to make separate lids. This way I could have some open ones with goods inside them.

Three BEF infantry from All Quite inspect the new crates. Perhaps hoping for a selection of nice cheeses inside?

 Next step mold making!

Friday, May 23, 2014

Rumblings on the Martian Front

I was more than slightly surprised to come home yesterday and find a package containing the first part of my All Quite on the Martian Front rewards from the Kickstarter. I'm particularly excited because of the four Kickstarters that I've pledged for over the past 2 years this is the first one I actually got something from.
 
Box stuffed with plastic sprues, and this only about half of what I should get.
 After a quick search through the box I pulled out some of the metal miniatures first to clean up. They all looked like rather nice sculpts and although there was some flash on them they were pretty clean. I pulled three of the fleeing civilians to be first into the paint queue.

3 of the 6 or so poses of civilians. Is it wrong that these are the figures that I was most looking forward to?
The plastic sprues also look really good but I'm going to put them aside for the moment in order to get to work on the guys I can use immediately in my own project. The digest sized rulebook also looked nice and I'll have to spend some time reading it over. I'd like to use everything that I can interchangeably between my own Steamworks and the official system. I'll have to figure out a good basing system, especially on the infantry, to do so.

Steam tank sprue on the left and top half of a Martian tripod on the right.

Thursday, May 8, 2014

Bullseye O'Rourke

It's been far too long since my last post and I'm not really sure where the time went. I've been picking away at a couple of projects but nothing too completion unfortunately.
Bullseye O'Rourke armed with his custom made Sharps Big 50 rifle.  
To avoid ignominy of not having anything done for so long I painted up one of the characters I had previously picked up. I think he's from the Rebel miniatures steampunk pack. Hopefully I can get a few more small posts in and get back in the hobby groove. 


Checking in with the locals.

I dressed him up a bit with a tartan waist coat. He also has some five o'clock shadow but not sure how well that came out in the pictures.


Tuesday, March 11, 2014

More hedges


Here is the rest of the first batch of hedges done. I'm going to make a second set as these were pretty easy and fun to do. Probably make them shorter than the first ones and definitely need to make some gates and corner pieces.


In the meantime I realized that I need to start making some boards for all of this stuff to go on. I've been debating what size and style to go with. Although I visually prefer specific built boards I think for ease of use and practicality I'll make simpler modular ones to start.


Having not played a game yet I'm really not sure how big of a board I should be aiming for. But I'm thinking between manipulating force size and how dense the terrain is I can get away with something along the lines of 4' x 4'. 1 foot squares would give a lot of variety but they don't have a lot of room to make features. 2' square might end up being a little more difficult to store for me.

Just about enough to make a half way decent hedge maze.

So in the end I'm compromising with 1.5' squares. I'm planning on four easy sections first, two with roads and two with hills.

My basic layout currently under close inspection.


Friday, March 7, 2014

Townsfolk

My first set of hedges are mostly finished now but first I also quickly painted up another figure. Once again he is from Khurasan this time from the zombie line and is one of the locals from the Stay off the Moors! set. Although a couple of the figures won't work for me I thought most of them would work as armed Victorian townsfolk as well.

Simple straight forward paint scheme for this simple farmer.

Unfortunately afflicted with the horrible "Sprayed on Cat Hair" disease. Rampant in this neck of the woods.
Related Posts Plugin for WordPress, Blogger...