Projects

Thursday, July 25, 2013

Construction Continues at Lower Fickleham

I finished off the road tile this weekend but have been a bit lazy about taking pictures of it. I'm sure part of this is due to being less than happy with how it came out. A couple problems cropped up while working on it as I noted in the last post but I think on the next one I can correct some of them.
 
British forces spread out to inspect the new roadway.

A local businessman and wife look on in despair at the state of the local thoroughfare.
The toolmarks from the stamps are still too evident but I think a redesign of my stamps and a little bit more care will solve that problem. The bigger one is the cracking and warping. Patching them didn't really work that well. I'm going to try going back to DAS clay as I've had better luck with it in the past. Maybe a few smaller sections that I can glue on will work as well. I'll try to do some smaller scale experiments and see how it works out.

"Shameful lack of maintenance!"
I've also started painting the buildings and as is my habit I like to name all of my terrain projects. After wandering through some random name generators I've settled on Lower Fickleham. I don't know if there will be a Greater (Upper?) Fickleham more than likely it will be some old ruins or maybe a castle. Either way I need to get what I have painted first before worrying to much about that.


There is another one in process as well but the picture I took was so out of focus I didn't include it.


Friday, July 19, 2013

Road Construction Season

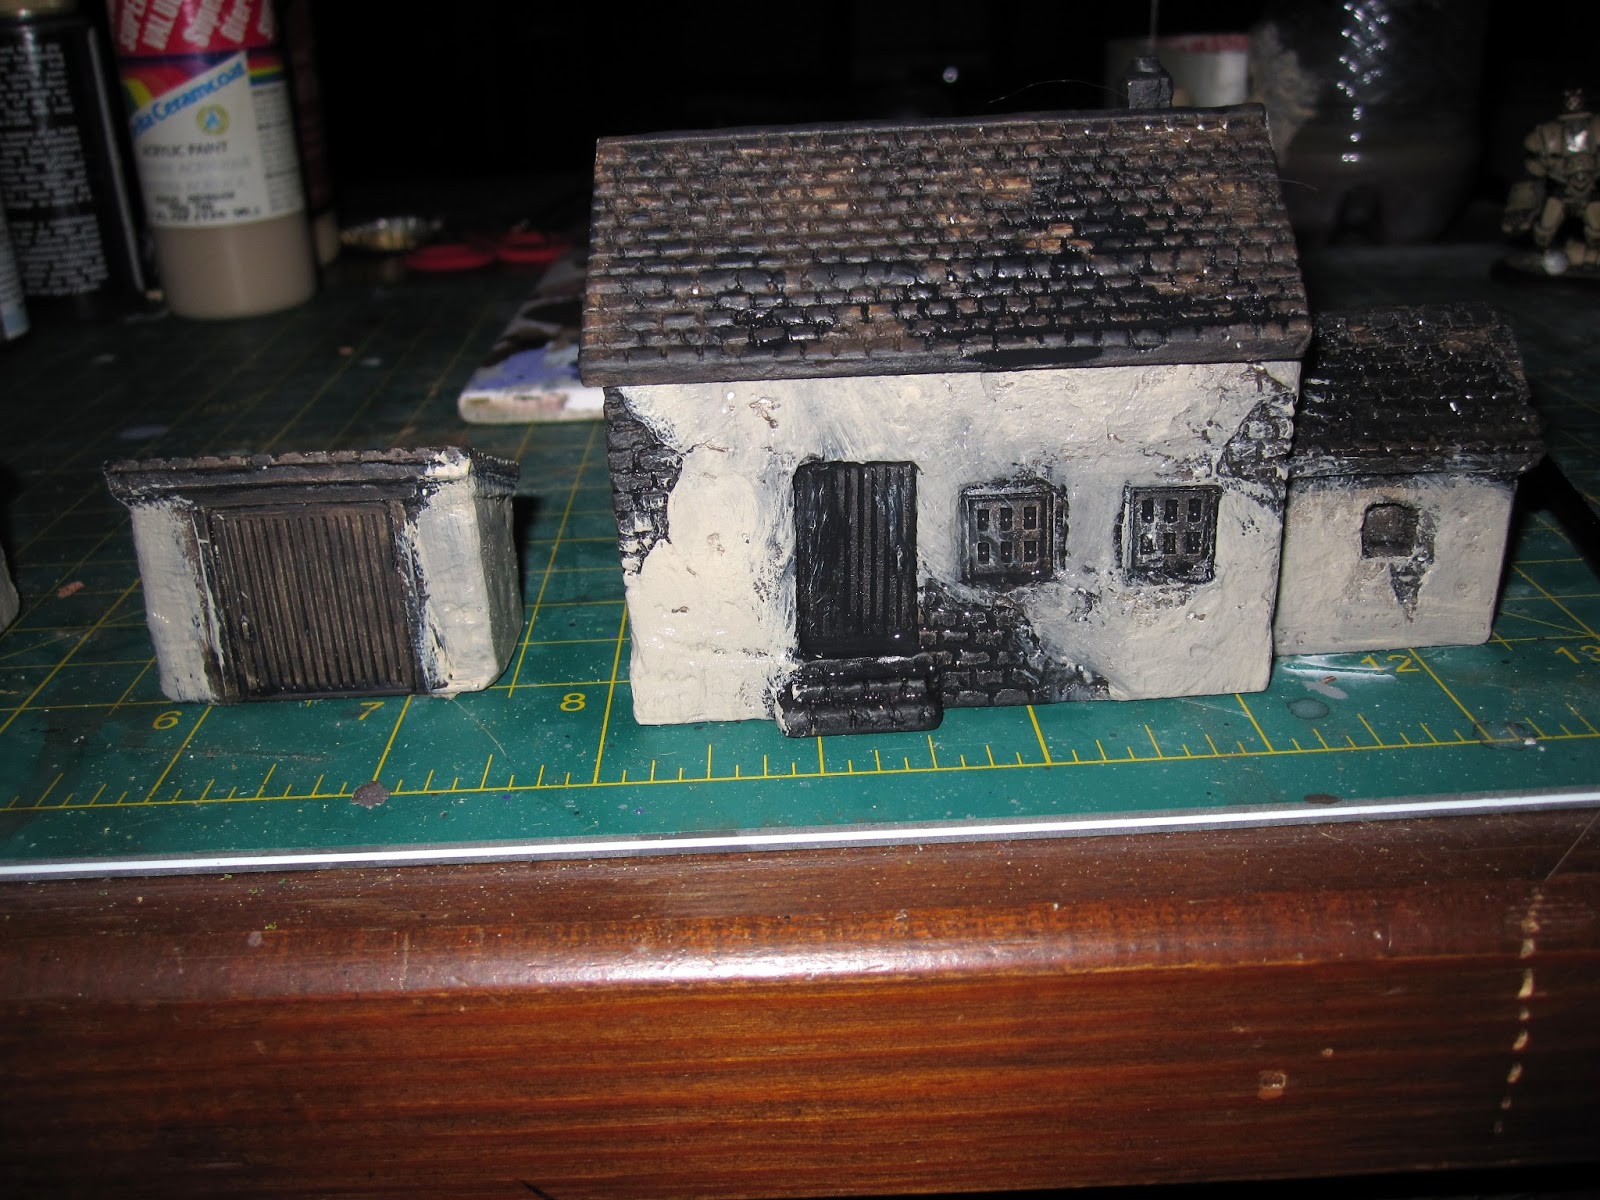
I recently picked up some 15mm buildings from Crecent Root. I was originally looking for some laser cut MDF buildings but I couldn't find anyone on this side of the pond that was making anything nice and reasonably priced. Or really much of anything that was in the right scale and time period.

The buildings I got are obviously intended for WWII but I think they'll work well enough for me. I'll do a post about painting them up soon as I get them done but first I wanted to make a board for them. My plan is to put them together into a little village with cobblestone streets. (Well technically they're paved sett streets, as cobblestones are round stones and nobody really used them for paving anymore, instead using rectangular granite setts sometimes called belgium block.)

Laying out the roads. I wanted them off center so the buildings would cross over tiles and help hide the join lines.

I decided to reuse the vinyl tile idea for the base but I wanted to add the cobblestone street. Since I didn't feel like sculpting thousands of individual stones I decided to try stamping out the road. I sculpted a couple of small patches of cobbles out of Procreate. Then I used a plastic instamold to make the stamp from them.

The instant mold sets hard so should work as a stamp. This stuff is from CoolMini but I'm sure there are others available.
I then pressed a layer of air hardening clay down for the road. I sort of humped it in the middle and blended it down toward the edges. Then I stamped away. I had to blend the different areas together and resculpt some of the stones to fill in areas. Then I put it away to dry overnight.

Next day I got a nice surprise as the clay had shrunk and cracked as it dried. So I reglued the pieces down to the tile and filled in the cracks with some new clay and pressed in the pattern again. I also layed down some wood filler in other areas to blend the roads in and add some texture. I'll use more on the roads themselves to hide the worse defects in the cobblestones.

                    I bought the clay specifically because it stated little shrinking or cracking. I'd hate to see lots of cracking.                      The clear blobs in the upper left are my stamps.

Hopefully painting will help hide the grid of tool marks from the stamping process.
Next up: Painting and flocking


Wednesday, July 17, 2013

Shoggoth

The Shoggoth is from Reaper Miniatures. I suppose he is intended for 28mm but he'd be a pretty small Non-Euclidean horror at that scale. About the size of a large dog maybe?

It's Alive!!!! But I thought it would be bigger?


 In 15mm though he's far more frightening.

                                        "Which part should I mount as a trophy?"                                              "Maybe we should run away first and talk about it later, Sir!"


Nothing really fancy going on with the paint job other than putting some gloss varnish on the green bits and the slime trail on the cobblestones. I resisted the temptation of making all the green things eyes and went for more of an energy look. I thought it would look a little less cartoony that way but I'm not sure now if I made the right decision.

I'm going to try to find a couple more similar figures though. I'd really like one in a more vertical posture, rising up to attack something. Maybe if I can't find anything I'll sculpt some of my own.


Tuesday, July 9, 2013

Xeno Earth

This was the fourth of my planned posts for the Ark Tangent project. I was able to finished up the terrain pieces this weekend, so that's one more project checked off.    

Part of the reason for the Ark Tangent project is because I wanted to make some terrain pieces that aren't as brain intensive as the things I've been making recently. I have a bunch of unused plastic plants hanging out in the basement and I want to put them to use. Also I enjoy making rock outcroppings so the two combined pointed me in the xenoformed Earth concept. Some of these pieces might see some dual use in the Steamworks setting too, maybe as Northwest frontier terrain or Venusian plant life or something.

Standoff in the Wastelands
The plants were basically just glued to some washers, textured the bases, and painted with a black gesso undercoat. I've read that the gesso has enough flex to not peel off the plastic plants so we'll see how that goes. They were painted up in alien colors and some static grass was added.

I added little chunks of slate to the plants and blended it all in with wood putty.


The rock outcroppings are pink insulation foam cut to shape, covered with some thinned wood putty, textured, and painted.

I cut the foam with a lot of horizontal lines and then picked out the shape of the rocks.


I didn't get around to doing a board for all of this to go on so I just used a chunk of slate from by backyard. A little to heavy and oddly shaped to be a long term solution however.

Both of these guys looked a little dark in the previous posts So I thought the deserved a couple more pics.


The Coming of the Ark

Desperate to resecure its position after the rebellion of the Jovian Collective, the United Earth Government saw the alien Ark as a godsend. However, the mission did not go as planned. The UEG team made contact with the Ark but this only seemed to activate its primary function, to xenoform a planet to be habitable to its long dead creators.

Once in orbit the Ark reformed itself into a massive orbiting installation and simultaneously splitting off several relatively smaller craft that dispersed both across the planet and throughout the solar system. Almost immediately the biosphere began to change as parts of the Ark rained down on the planet below.

In less than a year the planet has been massively reshaped. Almost all flora on the planet has died, the air is now rich with alien compounds hazardous to Terran life, and the temperature of the planet has risen as the atmosphere is now full of greenhouse gases and a higher oxygen content. While parts of the planet are barren others flourish with new alien life. These new plants, animals, and things harder to classify seem to be living parts of the process. Organic factories and workers hastening the xenoforming and continuing to transform the planet.   

Wednesday, July 3, 2013

The Joys of Khaki

 I have entirely too many partially finished projects languishing on the workbench so I'm going to try to finish off as many as possible in the next month before starting anything new.


Checking out an abandoned farm somewhere in Canada.

In that spirit I finished up the first group of British infantry. Pretty straight forward and they were done basically the same way as the Lt earlier. I hemmed and hawed on which uniform to paint up my Brits in. The red is visually very stunning but I've always had a fondness for khaki. In the end I decided to go with khaki as painting the mechs in bright red seemed a bit much too me. Although now that I think of it maybe a ceremonial guard in full dress would be kind of cool.
 

I'm thinking of making some backgrounds to fill in the white space in the background for these pictures.

I have five more to do but I'll probably do some more individual guys first to give myself a break. And I really need to get more robots and monsters done too. And some new scenery. Well I'll try to give myself a month of clearing out the queue before adding anything new to it.
 

No chickens here Sir!


Related Posts Plugin for WordPress, Blogger...